

How To Remove A Background On Procreate
This mail service may contain affiliate links, which means I may earn a commission if y'all decide to purchase through my links.
Removing the background of an paradigm or a piece of art is a actually important feature of any design software. In the past, many of us turned to Photoshop to remove backgrounds and perform this magic. These days, nosotros tin can use Procreate!
To remove the groundwork of an image or piece of art in Procreate, you tin either use the choice tool or the eraser. The selection tool lets you isolate the chief subject of your image or piece of art and copy and paste it to a new layer. The eraser allows for a more than hands-on approach.
The techniques we're going to talk about for removing backgrounds in Procreate volition work for photographs and images.
These same techniques will also work if y'all need to digitize your traditional fine art.
There are whatever number of reasons you would want to remove a background. Photobashing, creating new types of art, cleaning upwardly an image, and more.
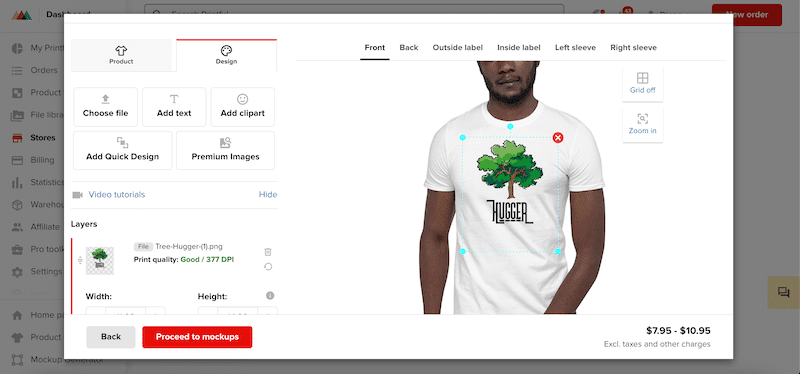
Preparing art to be sold through print on demand is a very important reason for learning how to remove backgrounds.
If you lot plan to sell your art on mugs, shirts, sweatshirts, or any other product you tin can imagine, yous'll NEED to remove the backgrounds of your designs and fine art (by the way, Printful and Printfy are my meridian print on demand choices for getting awesome products to sell my art on).
There are a few methods you'll want to understand to remove the backgrounds from your images or fine art. The method you choose will depend on they blazon of background you're working with.
For case, if your groundwork is really busy and chaotic, you lot'll want to use a different method than if you accept a solid background.
Alright, let'due south bound into how to remove your backgrounds with Procreate!

Employ the Automated Selection Tool to Remove Backgrounds with Procreate
If you have a solid background that is in high contrast with the paradigm yous're trying to isolate, using the automated setting of Procreate's selection tool will work well for removing the background of your photograph or fine art.
This method will work best if your paradigm or artwork has these qualities:
- Your background doesn't have a lot of item
- The discipline you want to isolate is big and stands out from the background
- Your background and epitome have high contrast (a charcoal cartoon on a cream piece of newspaper, for example)
In full general, this method works best for digitizing art. This is considering the backgrounds commonly encounter all of the criteria above.
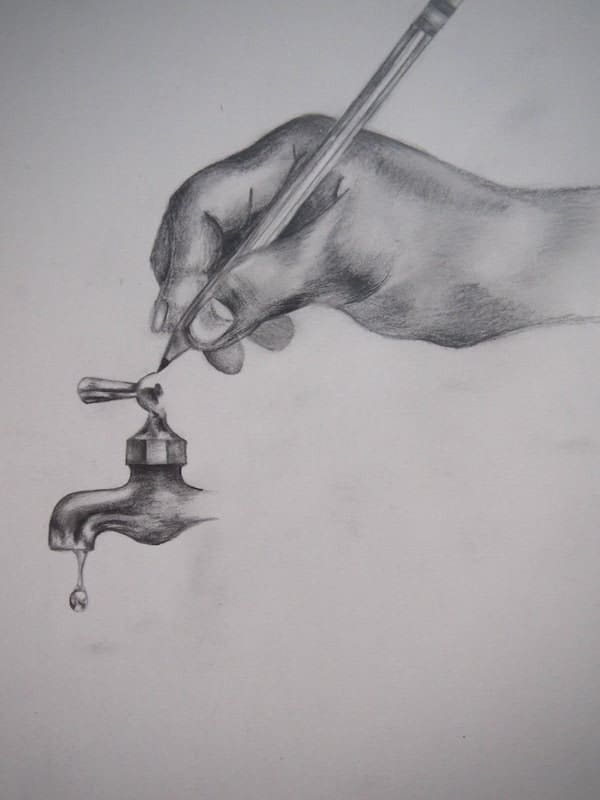
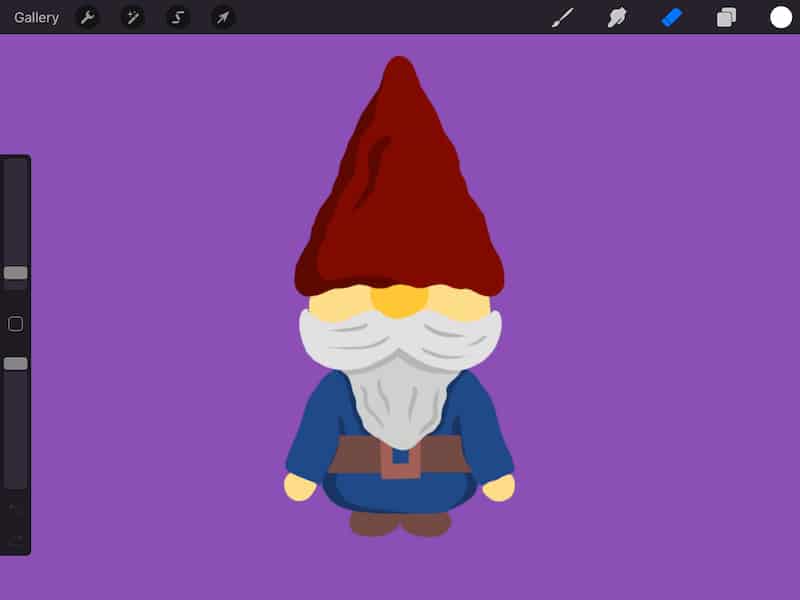
Look at the instance beneath of a traditional drawing I did. I demand to remove the groundwork because I don't want the paper outlining my piece of work. That said, my field of study matter stands out really clearly from the paper groundwork and tin can exist hands isolated from information technology. That makes it a practiced selection for the automatic selection method.
Photos, on the other mitt, are more than likely to have decorated backgrounds that confuse the automatic selection tool.
If you aren't sure if the automatic selection method is the right pick for the image or slice of art yous're removing the groundwork of, give information technology a try and encounter what happens. This method is the quickest method on this list, so you won't waste a lot of time experimenting with it.
Whenever I need to remove a background, I e'er effort this method beginning, even if I don't think it volition work with the groundwork I have. If information technology doesn't piece of work, I undo it and movement onto another method.
Hither are the steps you'll want to have to remove your background with Procreate's automatic selection tool:
1. Create a new canvas or hide everything on your existing sheet
The image you want to remove the background from should be the only matter visible on your Procreate canvas. Either start fresh with a new canvas, or uncheck all your existing layers until your paradigm is the only matter left.
ii. Import your epitome, if needed
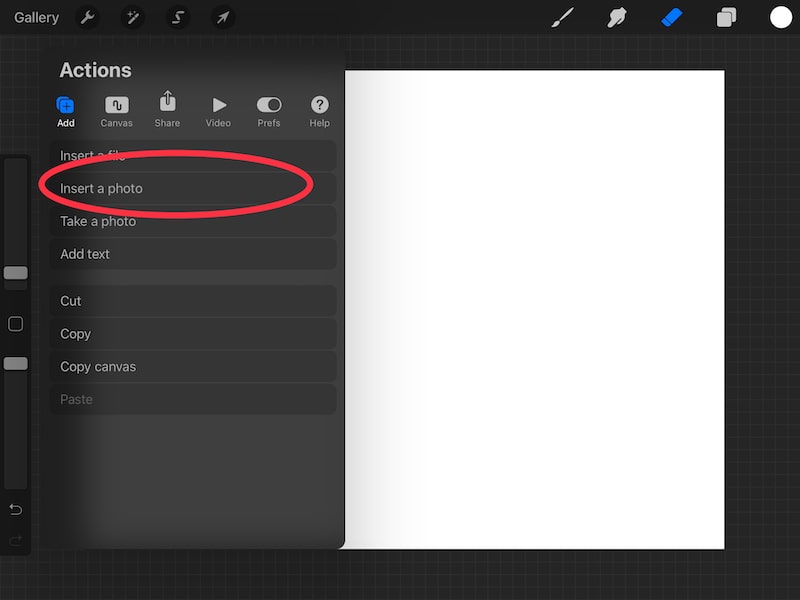
If you haven't done so already, click on the wrench to open the Actions menu. Click on the "Add" button then click on the "Insert a photo" push. Choose your photo and import it into your Procreate canvas.
3. Stretch your image across your canvas
In the peak toolbar, click on the Transform tool (the arrow icon) and stretch your image across your sheet. Utilise the Uniform setting and then that your image doesn't get distorted. Make it equally large equally possible.

Feel gratis to let your background fall off of your sail infinite. This will really make it easier to remove whatever background is left. But make certain that your principal epitome doesn't get cutting off.
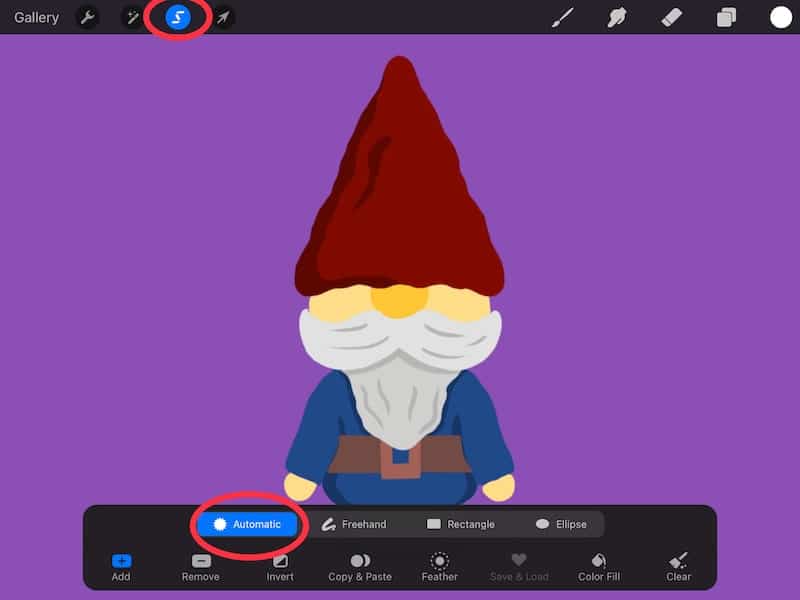
four. Click on the Pick tool and cull the automatic setting
In the top toolbar, click on the Option tool (South icon). Within the Selection settings that appear at the bottom of your screen, choose "automated."
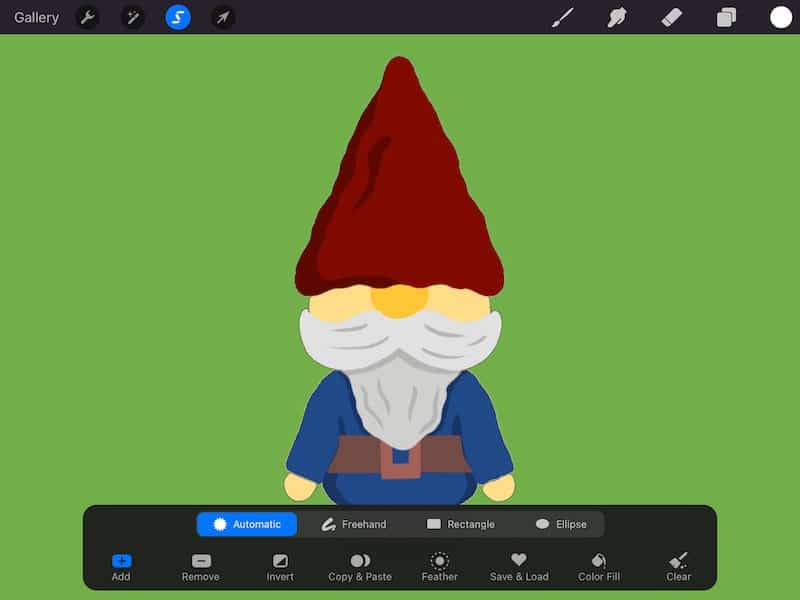
v. Click on the background of your image
One time yous have the automatic setting selected, tap on the groundwork of your image. You lot'll run into it modify colors.
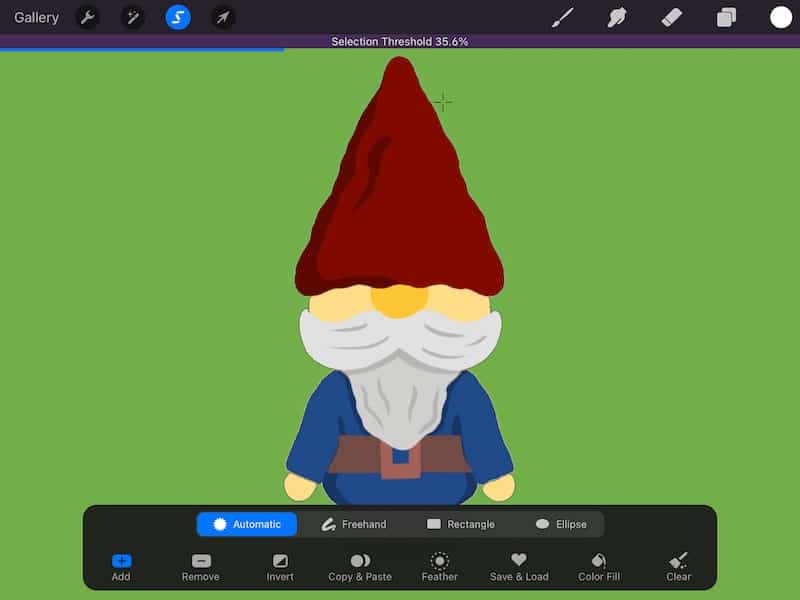
6. Slide your finger across your screen from left to right to increment the selection threshold
This is when you'll figure out if this method will work for your epitome so, buckle upwards.
When you clicked on the groundwork, you probably noticed that it changed colors. Our goal hither is to have all of the background be that color, with our primary image staying unchanged.
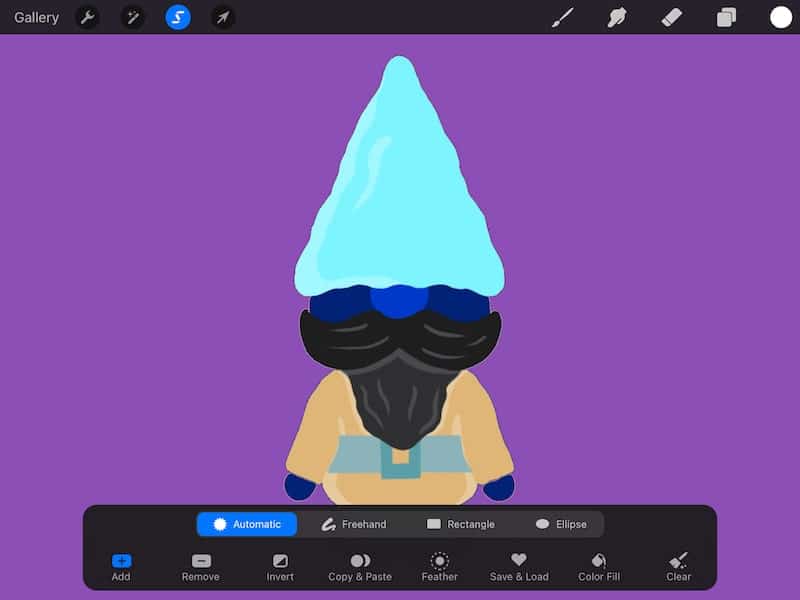
In this case, nosotros want all of the background to be dark-green without any of the green spilling over into the gnome. If we come across any light-green on the gnome, nosotros've gone too far.
You want to capture as much of your background as possible before it starts seeping into your primary image.
To practice this, slide your finger across your screen from left to right. This will increase your choice threshold. Only slide until yous find the choice offset the seep into your principal image. One time it does, decrease the threshold once again until only your groundwork is selected.
If you notice that y'all can't click on your background without some of your primary image beingness selected, this method won't work for y'all.
Past default, the automatic selection setting will kickoff off at the minimum threshold. So, if y'all tap on your groundwork and the selection is already seeping into your chief image, that's a articulate sign this method won't piece of work for the background and image you lot've chosen. Go on reading to learn how to use the other methods of removing your background.
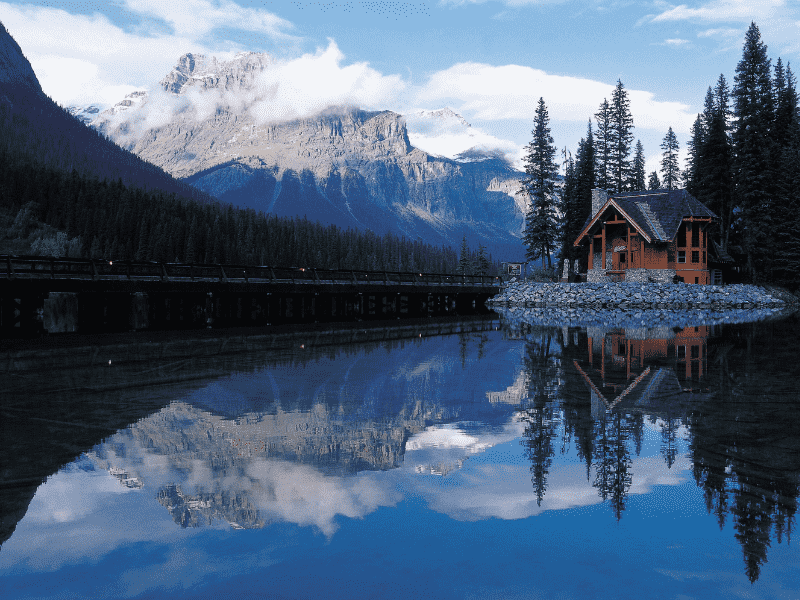
For example, hither'south what happens if I automatically select the groundwork of that nature scene. Even at the minimum selection threshold, the selection spills into the cabin, and so this method won't piece of work for this paradigm.

On the other hand, yous may detect that your selection doesn't capture your entire groundwork. In some cases, that'southward ok. You can use this method and so utilise your eraser later to clean upwardly whatever of your background that is still lingering on your canvas.
Ideally, you'll be able to click on your background with the automatic selection tool and it will merely select your groundwork, without your primary paradigm included.
You lot volition still want to increase your selection threshold as much equally possible because, without doing so, you might discover an outline of your background colour nonetheless lingering on your principal prototype.
7. Click on Invert
The "Invert" push is in the Option settings at the bottom of your screen. When yous invert your selection, you'll finish up selecting your chief image instead of your background. That's what we want to do!
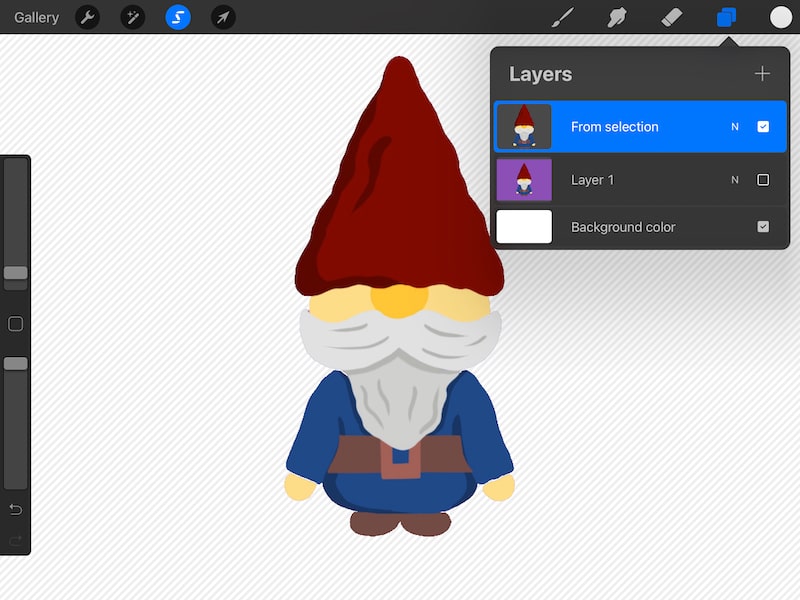
8. Click on Copy & Paste
The "Copy & Paste" button is in the Selection settings at the bottom of your screen. Copying and pasting volition accept your master image, which is now selected, and paste it onto a new layer.

9. Uncheck your first layer to double check your work
At this point, nosotros've finished the procedure, but yous'll want to check your work. Get into your Layers panel and uncheck your original layer to hide it. This volition go out your copied and pasted layer as the only visible layer.
Take a look at this layer to make sure that your primary prototype looks skillful and that your background has been successfully removed.
10. Clean things upwardly with the eraser, if needed
If any of your groundwork got left behind, click on the eraser tool to clean things upwardly, if needed.
This method of removing yous groundwork with Procreate's automatic selection tool is the quickest method. That said, it doesn't always piece of work depending on the image you're using.
If you find that this method isn't working for you, here are other methods to try.
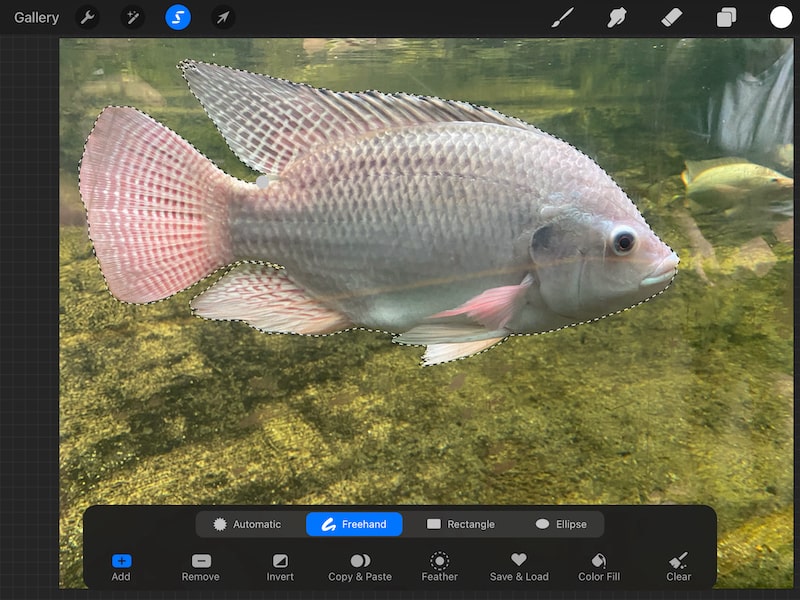
Apply the Freehand Selection Tool to Remove Backgrounds with Procreate
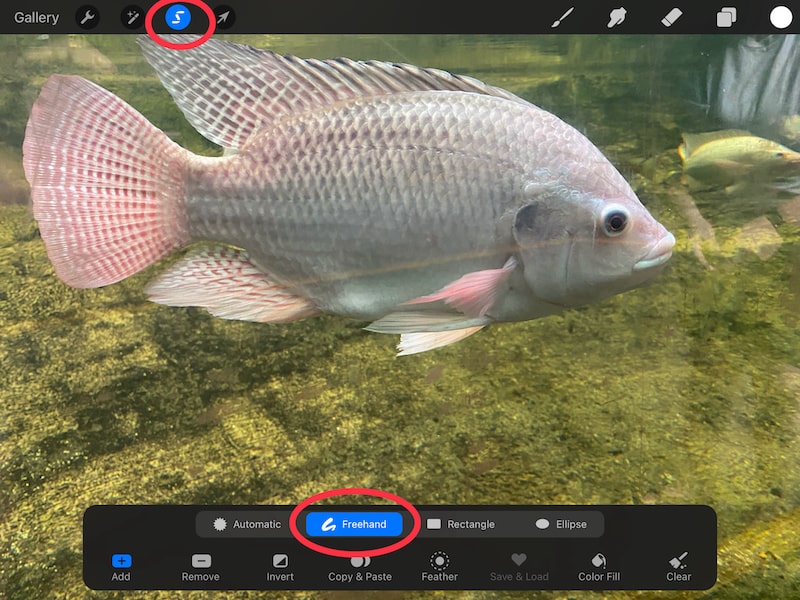
If your background is busy, or the image yous want to isolate isn't in high contrast with the image you lot're trying to isolate, using the freehand setting of Procreate'due south selection tool will work well for removing the background of your photograph or art.
This method will work best if your image or artwork has these qualities:
- The automatic selection method didn't piece of work for yous
- Your background is busy
- The image y'all desire to isolate doesn't stand up out from the background (doesn't accept high contrast)
In full general, this method works best for photographs. Fifty-fifty if your photograph does run into the criteria for the automatic pick method, for some reason, Procreate struggles with photographs. This freehand method is usually best.
Here'south how to remove backgrounds with the freehand option tool in Procreate:
one. Create a new sail or hide everything on your existing canvas
The image you lot want to remove the background from should be the only affair visible on your Procreate canvas. Either start fresh with a new sail, or uncheck all your existing layers until your paradigm is the only thing left.
2. Import your image, if needed
If you oasis't done so already, click on the wrench to open the Actions menu. Click on the "Add" button and then click on the "Insert a photo" push. Choose your photo and import information technology into your Procreate canvas.
3. Stretch your image across your sheet
In the superlative toolbar, click on the Transform tool (the pointer icon) and stretch your image across your canvas. Make it as large equally possible.
Feel free to let your background fall off of your canvas space. This will really make it easier to remove whatever background is left. Just make sure that your primary image doesn't become cut off.
4. Click on the Selection tool and cull the freehand setting
In the top toolbar, click on the Selection tool (Southward icon). Within the Choice settings that appear at the bottom of your screen, choose "freehand."
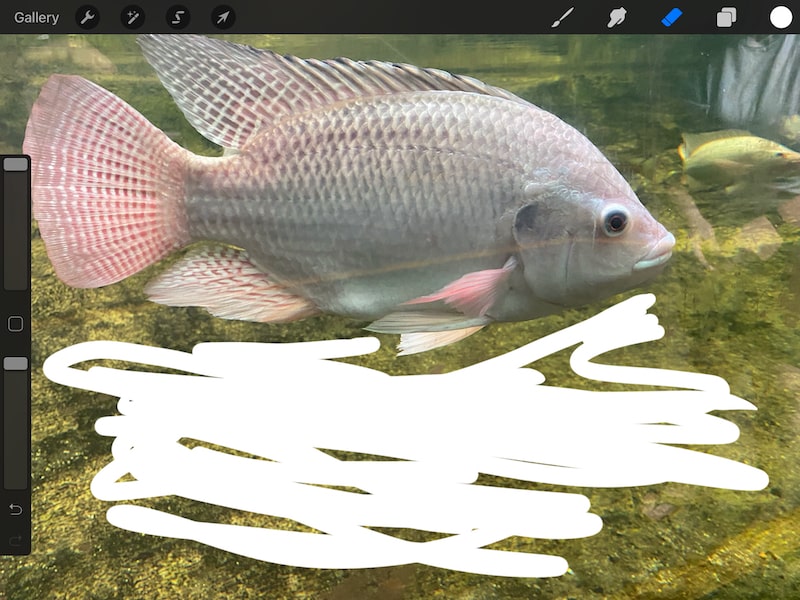
five. Outline your image with the freehand pick tool
Start outlining your image and yous'll see a line appear that looks like a row of marching ants. Make sure that you hug your image as tightly every bit possible.
Annihilation that ends up within your marching pismire outline will be preserved. Annihilation you leave exterior of it will ultimately be deleted.
When yous're finished, make sure that the ends of your lines encounter. Basically, your outline needs to be a airtight shape with the beginning of your line joining with the end of your line.
Important tip: if your prototype is really detailed and information technology's as well labor intensive to outline the whole thing with the pick tool, read the side by side section well-nigh removing backgrounds with the eraser tool. There's a fashion to merge this selection method with the eraser method when working with really detailed images.
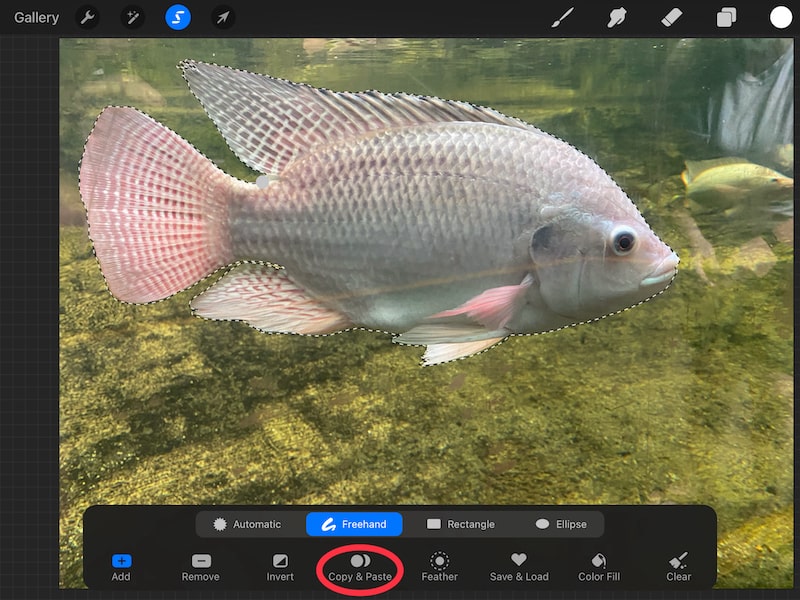
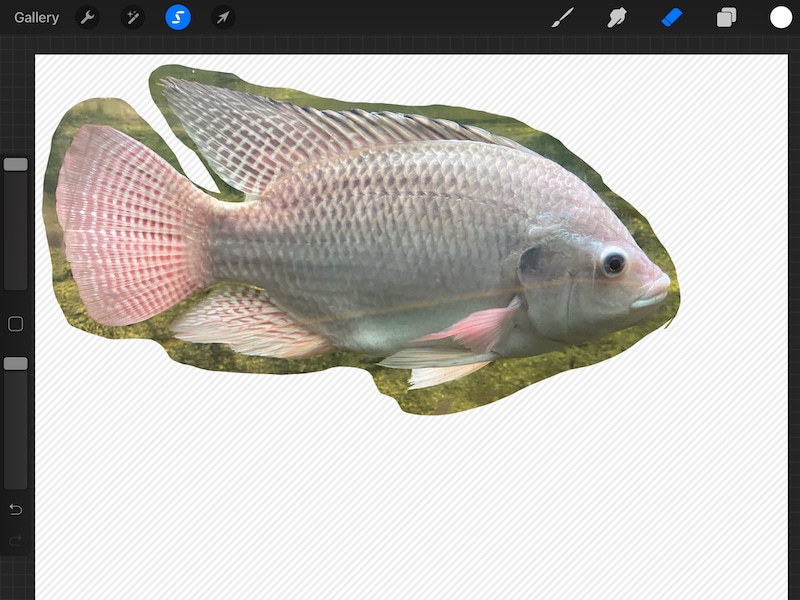
6. Click the Copy & Paste button
Once you're done with your outline, click the "Copy & Paste" button within the selection tool card.
This will re-create and paste your selection to a new layer.
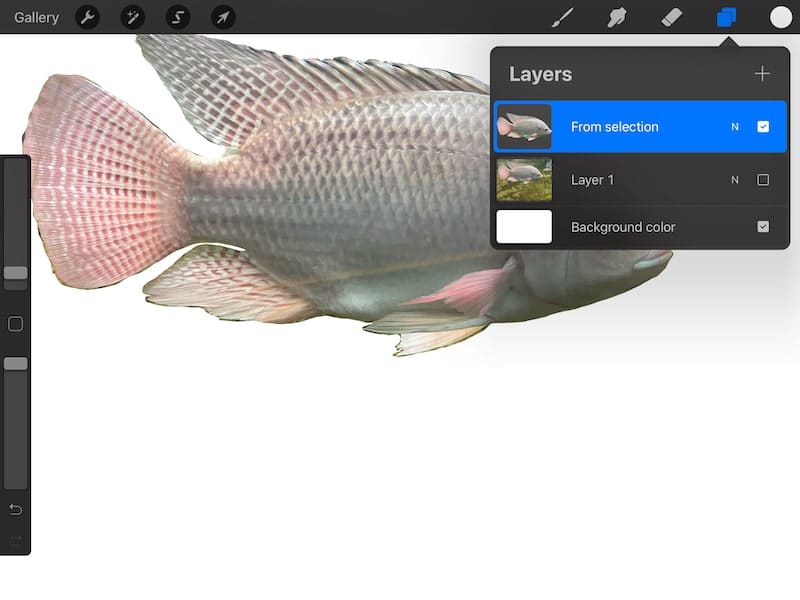
seven. Uncheck your original layer
You now have a new layer with only your selection on information technology. Ideally, this should be your primary image without the background.
Uncheck your original layer then that this new, copied and pasted layer, is the simply thing that's visible.
8. Clean up your work with the eraser tool
Have a wait at your new layer and make sure that your entire background is gone. Using the freehand option tool can be tricky, especially if you have a detailed image. Information technology'southward possible that some of your background is however hanging around.
If then, grab your eraser tool and erase whatsoever devious groundwork marks past manus.
The eraser tool is a handy asset to take when removing backgrounds in Procreate. In fact, you can remove your entire background with it.
Use the Eraser to Remove Backgrounds with Procreate
Another method for removing backgrounds in Procreate is using the eraser tool to remove everything bated from the primary image. This method is the most time intensive, simply it can be useful for detailed images that require a lot of precision and small movements.
This method will piece of work best if your image or artwork has these qualities:
- Your paradigm is very detailed
- Your epitome doesn't have a lot of groundwork (read nigh the next method if your epitome is detailed and also has a lot of background)
- You prefer to practice things by manus
The eraser method works best if you lot have a detailed image with a lot of pieces sticking out into your groundwork. Think most a porcupine vs. a basketball.
If you employ the selection tool, it might be hard to preserve every single quill. Using the eraser, you lot can lower the size of the tool as small as needed so that you tin can manually erase in every nook and cranny.
Utilize the Freehand Selection Tool and the Eraser Tool Together to Remove Backgrounds with Procreate
If yous accept a detailed paradigm, merely you don't want to erase the entire background by hand, use the freehand selection tool to loosely outline your paradigm and remove every bit much of the background as possible. And so, use the eraser to remove the sections that require more than precision.
This method is a mashup of the freehand choice method and the eraser method.
This method will piece of work best if your image or artwork has these qualities:
- You have a detailed image
- Your paradigm has a lot of groundwork that can hands be deleted
- You want a quicker method that sill includes some manual erasing
Follow all of the steps listed in the freehand selection section. But, instead of trying to hug your image as tightly as possible with your pick, simply loosely outline your paradigm.
Once you're washed, take hold of the eraser and use that to stop removing the background.
This mashup method can be a quicker mode to remove the vast majority of your background, while still giving yous the ability to apply the eraser for the more detailed work.
Removing the groundwork of images and artwork in Procreate can exist deadening at times, but it is like shooting fish in a barrel in one case yous go the hang of information technology. It as well opens up so many doors for you to be able to sell your piece of work on products, digitize your traditional art, and more than!

Diana has been an artist for over 25 years and has training in drawing, painting, digital drawing and graphic design. Diana'south latest obsession is digitally drawing with Procreate and creating t-shirt designs with Canva. Diana has experience selling her art across a number of platforms and loves helping other artists learn how to make coin from their art also.
Source: https://adventureswithart.com/procreate-remove-background-images-art/
0 Response to "How To Remove A Background On Procreate"
Post a Comment